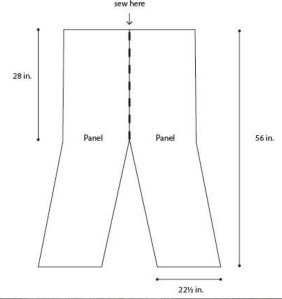
Ponchos and ruanas are popular styles of wraps. The ones I have woven are constructed from two rectangles sewn together. Rectangles are easy to weave.
But ever since I heard about double-weave, a process where two layers of cloth are woven at the same time, it has fascinated me. Double-weave can be used to create a cloth twice as wide as the loom (two layers connected at one edge), a tube of cloth (two layers connected at both edges), or two separate pieces of cloth (connect at neither edge). I knew I could use the process to eliminate the center back seam and weave a seamless ruana.
Double-weave can be achieved on a rigid heddle loom if you use two heddles but my RHL is only 25″ wide and I only have one heddle of each size. My 4-harness floor loom is wider and already has all the parts needed for this process.
Selvedges are often the most difficult to master part of weaving. If they are too loose, the edges look sloppy. If they are too tight, the cloth draws in. Weaving a double-wide cloth makes these issues even more difficult. On edges where the layers of cloth are connected, the weft must “go around” the edge from the top layer to the bottom. You need to leave just enough slack so the when the cloth is opened, the warp threads in this region are not distorted, too loose or too tight.
I read a lot of advice from other weavers and found these ways to minimize the selvedge difficulties.
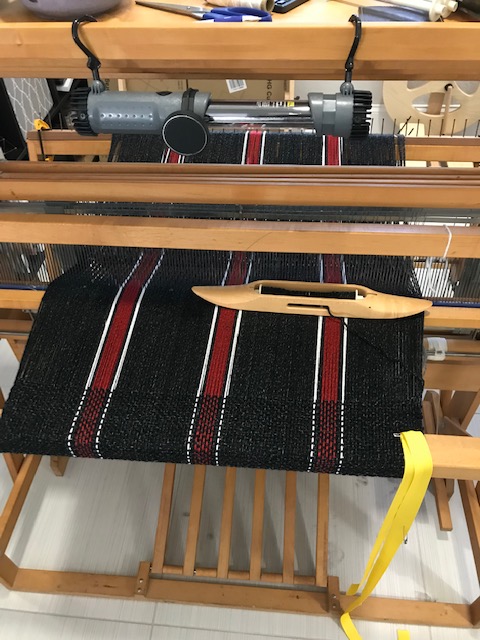
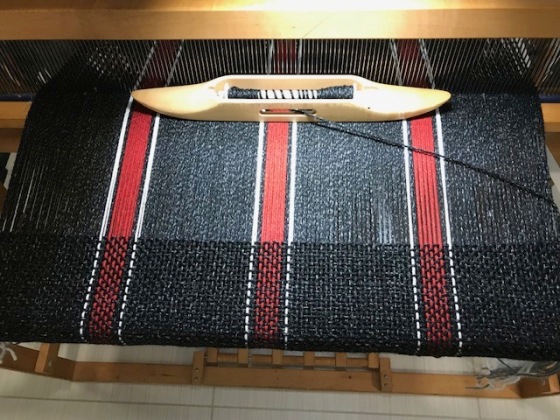
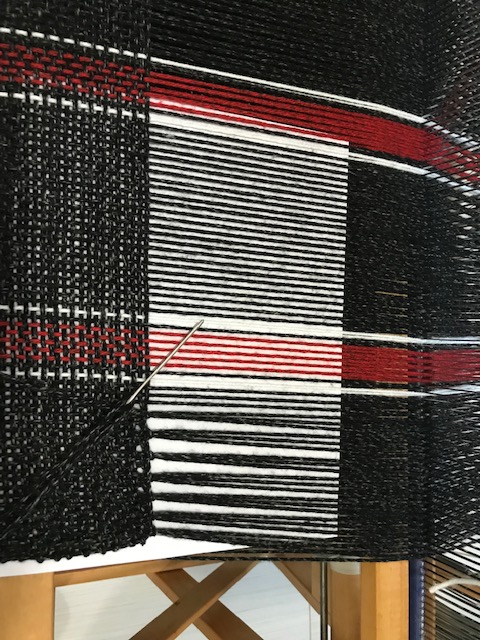
- This center region should be woven in the darkest color. If your warp has multiple colors, try to use the darkest color in this region.
- Add extra spacing to the warp threads in this region. If you are warping 3 threads per slot, switch to 2 for this region.
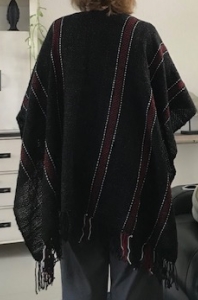
My project was a black ruana with red and white stripes. I decided to skip the stripe which would have been in the middle and leave this region black.
I would not have thought to do this if it hadn’t been for the double-weave but I like it so much that I will generally do this from now on. Whatever pattern I choose will be replicated on the two halves while the center region is left plain.
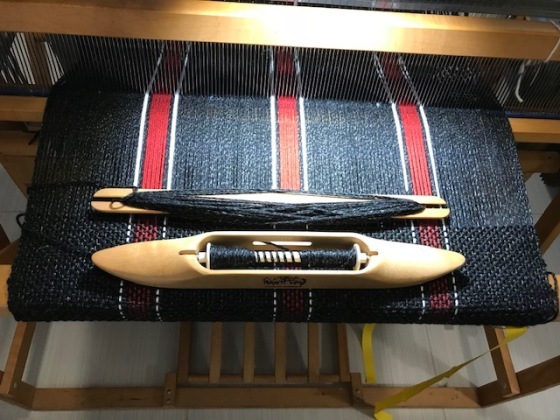
I won’t try to explain the whole double-weave process here. There are many very good tutorials available. Briefly, the warp is doubled in each slot. To weave a single layer of plain weave you need to create two sheds that alternate. To weave two layers, you need two sheds for each layer for a total of four.
When you are inserting the weft for the top layer, one quarter of the total warp threads are lifted. When you inserting the weft in the bottom layer, three quarters of the total warp threads are lifted. This is because you need to lift the entire top layer of cloth (half the warp) and half of the bottom layer (one quarter of the warp).
For this ruana, I connected the two layers of cloth along the left selvedge for the first half of the weaving. I did this with a single shuttle moving across the top layer to the left, across the bottom layer to the right, back across the bottom layer to the left, across the top layer to the right.
When I finished the first half of weaving I had a single piece of wide cloth. At least I hoped I did. One of the interesting things about double-weave is that you can’t see the bottom layer of cloth. I had read that some weaves use a mirror to see the underside of the cloth they are weaving to check for errors like floats. Even that technique would not find all the errors in double-weave since some of them would be between the two layer where a mirror would not see them.
The second half is woven with two shuttles so the two layers can be completely separate. I used two different types of shuttles to keep them straight. Even so, I kept check the edges to make sure I didn’t mix the shuttles and accidentally connect the two layers.
One of the things I learned about double-weave is that you cannot hem-stitch both layers. At least not on the starting edge. I did find a way to hem-stitch the edge at the end of weaving. I raised the entire top layer and inserted a piece of white paper between the layers. I hem-stitched the top layer. Then, I cut the top layer warp threads and peeled away the top layer leaving only the bottom layer behind. It was my first real look at the bottom layer and I was happy to see that it looks ok.
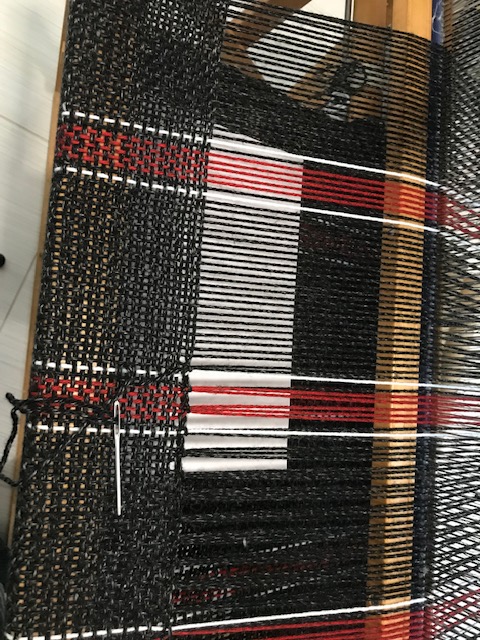
The white paper had been so helpful when hem-stitching that I used it to hem-stitch the bottom layer as well. As you can see, this technique would not work for hem-stitching the start of the cloth. But I will hem-stitch the top half of the cloth, leave a long tail, and finished stitching when it is off the loom before removing the woven header. I think it will work.


These pictures show the four sheds but are not intended to show the process. There are very good tutorials available for that.
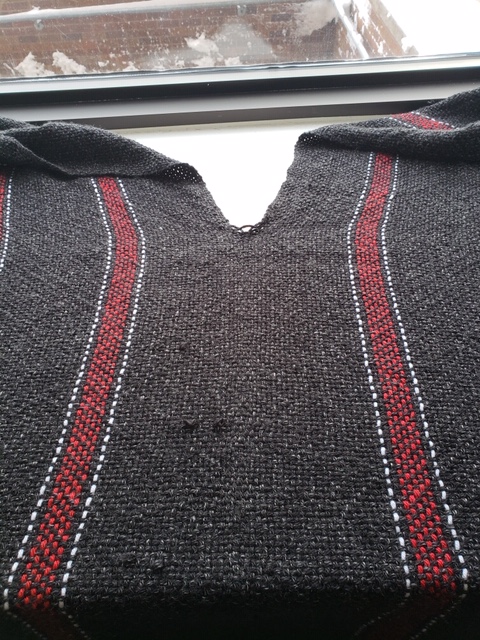
I was pleased with the look of the “seam” area (though a couple thread overlaps still need to be trimmed). I carefully paid attention to each thread as it passed through this area. I got better at it as I went but even the beginning turned out pretty well.
Here are some technical details of the project.
The yarn I used is Premier Everyday in colors Charcoal Heather, Red Heather, and White.
The reed was a 5 dent.
I hope you like this double-weave ruana. As always, your polite and helpful comments are welcome.

I love your double width ruana! Would you share the draft?
It is all just plain weave.
Well done! Enjoyed reading about each piece you wove!
Brilliant – THANKS!!!